Shhhh . . . Secret Sauce!

Okay, so it really isn’t a secret . . . if you’ve heard of it so I will share my knowledge of it with you.

The greatest addition to my culinary endeavors has now become a staple in my cupboard. It is called fish sauce. I don’t, however, use just any fish sauce as through use and research have discovered the best one around is called Red Boat Fish Sauce.

It is an interesting addition to just about any savory dish as you don’t so much taste a difference but ‘sense’ an added level to the meal. The best price I’ve found is on Amazon where it still seems a bit pricy BUT you only use a few drops to taste and a bottle lasts a long time. The best one, to my taste, comes from Viet Nam and the ingredients are only anchovy and sea salt. Take a word of advice, if you decide to try it, don’t smell it until you have used it the first time because . . . Well, consider, it is pretty fermented fish and . . .

A quarter of a teaspoon added to spaghetti sauce actually makes you wonder how you managed with spaghetti sauce up to that moment. I’ve used a few drops in regular vegetable noodle soup and always add a bit to any rubs I put on meats to be roasted.

Anyway, I thought I would share what secret sauce I depend on to make my own secret sauces!

Oodles of Noodles . . .

When we had to go gluten-free for my husband’s sake, it curtailed some of our convenience shopping. Gluten-free pasta is only, usually, as the price and the price is higher for a relatively good-tasting pasta. One brand actually had a pretty good egg noodle gluten-free version but it tended to fall apart a bit and cost over $5 for 12 ounces.

Our favorite meals have always been either chicken or beef soup enriched in taste with the addition of egg noodles. I discovered two gluten-free flours that actually work great on making homemade egg noodles and the noodles hold their shape and you can’t tell the difference between the gluten types. I will now share my ‘secret’ with you! Better Batter Gluten-Free flour has been a staple in my cupboard for the last ten years. I have made birthday cakes and cookies using it and have never been found out even from gluten-loving friends. However, for homemade egg noodles, Authentic Foods – Steve’s GF Bread Flour is my all-time favorite for making those noodles now.

BUT, how does one make gluten-free egg noodles? I was hoping you’d ask as it is one of the easiest recipes in the world and works with either the recommended gluten-free flours or regular flour if you have no dietary restrictions. I have to warn you, however, the recipe is one where you might have to make minor adjustments as you go along as dry/wet weather can change the outcome otherwise.

Basically . . .

2 cups of our flour of choice – gluten-free or regular
Eggs . . . I say just ‘eggs’ as this could take anywhere from four to six eggs before you obtain a malliable dough. The dough should be kneadable but not stiff or wet. It should be relatively easy to roll out and if you have to struggle to do so and feel your biceps getting painful exercise, you probably should have added a bit more egg.

That’s the recipe. To be adventurous, you can add a bit of paste-type bullion for more flavor or some dried herbs that might enhance the flavor of the soup or stew you are serving it with.

As for the rolling out, you can go really thin or a thicker version. A pizza cutter is great for quickly turning your dough into strips. ALSO, if you are making something like a vegetable soup and you would like a bit of pasta to add some more substance to the finished produce, you can use tiny cookies cutters for circles or even a suitable lid from some handly bottle in yoru cupboard.

Once you’ve made all your decisions on the pasta use, etc., start the rolling out and place the cut dough on a parchment paper lined baking sheet so they can dry a bit, In fact, you can made the noodles earlier in the day and with a few lengths of papertowel to cover, let them sit on the counter until you need them for dinner.

If you are using the noodles for soup, add them to the soup pot before serving. Keep stirring when you put them in to cook to prevent sticking. They usually take about three to five minutes and they are ready.

If you want to have the noodles with stew, just before you are ready to serve dinner, bring a big pot of salted water to a medium boil, add a couple tablespoons of olive and stir in your noodles to keep them separated, drain, rinse with cold water and then either add them to your stew or serve the stew over a portion of the noodles.

What to Do With Those Pesky Vegetables

Since we starting cutting carbs from our diet, it left us with an abundance of dinner time vegetables to plow through. My goal in life is to make coming to the table and seeing vegetables a treat and not an enhanced desire to sneak out later for a large order of fries and cola.

Seriously, we always have had vegetables on the dinner plate but with the absence of those fries, rice, and pasta, more have been added and it has been my job to make them something to look forward to come the dinner hour.

I’ve mentioned in other postings about roasting Kale (the #1 favorite to date!), sauteing carrots, and topping steamed/cold green beans with fun dressings. My lasted culinary attempt (tried twice and won family awards twice now!) is baked cauliflower. It is a very easy preparation and doesn’t need attention until the timer goes off.

One large cauliflower, broken down into medium to large florets
1/4 cup cider vinegar
1/2 cup Mayonnaise
1 tablespoon Brown Mustard
Nutritional yeast*
salt/pepper to taste
Finely diced green onion or shallot
AND – this is where it gets personal! Check your herb/spices and see what might go well for the seasoning. I’ve used ground caraway, garlic salt, granulated onion, Basil, Rosemary, etc. Every family has their favorites. (Want more options? Check our The Spice House https://www.thespicehouse.com/ as not only do they have an extensive selection, they tell you about them!)

Preheat your oven to 350 degrees.

Place your prepared cauliflower in a large bowl and mix with the vinegar, mayonnaise, and mustard and mix to coat the cauliflower. You don’t want to drown it. Add the rest of the ingredients, mix well, again, and place on a rack in a rimmed baking sheet and bake until golden, JUST fork tender, and with some slightly charred edges. Serve!

*Nutritional yeast can be found at Walmart or the health store. It adds a mild cheesy flavor, a bit of texture, and a multitude of B vitamins.

Sort of Secrets From My Kitchen . . .

Okay, here are some of my secrets for getting food from my imagination to the oven and then, to the table in a timely manner almost 365 days of the year!

How do I get dinner freshly cooked not always knowing exactly when my husband will get home from work?

Number one rule, never plan on having a souffle! If you want your husband to run really late, putting a fragile dish like that in an oven is sure to add ten to twenty minutes to his drive home.

On the iffy evenings, I usually go with an all-oven meal meaning that the top rack has the protein and the lower one takes care of the roasted vegetables. My roast of choice is usually a bone-in pork roast. Pork can always cope with extra cooking time and works well in a warm oven if the hour grows even later. Roasted vegetables are usually broccoli florets, chunks of zucchini, halved wedges of cabbage and mushroom caps. I just put them all in a bowl to marinate in olive oil, grated lemon zest, salt, pepper, and anything else that sounds interesting. I bake them for around 20 minutes on a parchment paper lined baking sheet. Slice the pork, put the vegetables in a dish and dinner is ready. Yes, you will note there isn’t a mention of potatoes or any other starch. We watch our carbs and don’t usually indulged. I just gave you the basics so you can go crazy on favorite family additions.

How do I juggle my time with all the prep work while trying to get proteins browned, fried, etc.?

I cheat in that when I clean up the kitchen after breakfast, I go ahead and cut up, shred, or dice whatever is going to be used in the cooking that evening. If I’m having salad, the greens are washed, patted dry and in a seal container in the fridge ahead of time.

How can one get two meat meals prepared at the same time, one for that evening and one for a desperate meal later in the week or even month?

When we have meatballs or meatloaf, I double or triple how much ground beef I use. The basic ingredients for the entire amount is usually finely diced onions, salt, pepper, favorite seasonings, some eggs and whatever extender one prefers like oatmeal, soaked bread . . . I usually use hemp hearts ’cause we are weird! At this point, half the meat gets shaped into a meatloaf and placed into an oven-safe Pyrex dish, securely covered with plastic wrap and frozen.

The rest of the meat is given some additional seasoning applicable to meat balls like a few chili flakes, oregano, basil, garlic powder, and finely grated parmesan or Romano cheese. They can then be browned and simmered in your favorite pasta sauce and served over sounds good that evening. I guarantee that days down the road, you are going to come home late from taking children shopping, getting the oil changed for the car, doctor appointments in a mild panic as to WHAT can you fix for dinner. Imagine the shock on your families face when an hour later, you take a brown meatloaf from the oven (cooking time depends on how thick you made it!), along with some favorite starch and vegetable. No time to cook vegetables, the family will think you are all too elegant serving a nice platter of carrot and celery sticks over ice. I DO put the frozen meatloaf directly from the freezer to the oven BUT do NOT preheat the oven. I turn it on when I put the meatloaf in place.

How do I have enough time to marinate meats or vegetables?

Accomplishing this task is how I formed such a close relationship with sealable plastic containers. Use your after-breakfast or after-lunch time for cutting up your meat or preparing your vegetables. Put them in the sealable containers with your choice of marinade, either homemade or bottled. One less thing to do between chores, laundry, and learning to take deep breaths to avoid panic!

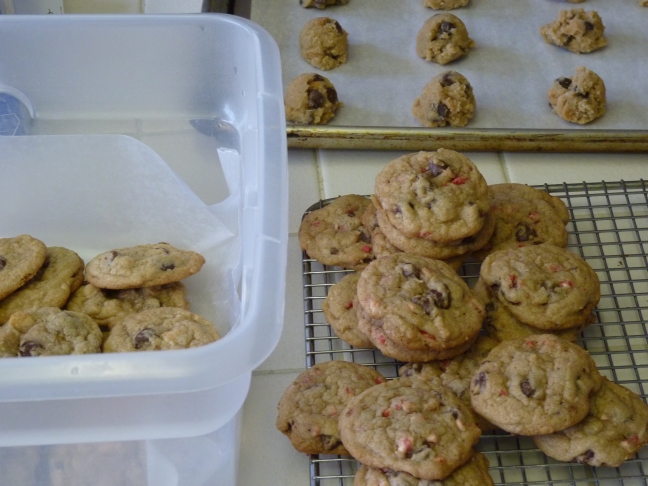
For me, breaking up the prep work during the day actually seems to provide with with more free time to work on some of my own projects or to take the earned time to make a surprise dessert/treat for the family.

Eating Healthy Isn’t All THAT Bad!

My husband has some dietary concerns so I’ve spent my almost 34 years with him evolving our meal menus to keep him in good health. In the course of my research and new recipes, we have learned to enjoy a lot of vegetables, etc., we never thought we’d ever find in our kitchen.

When I was growing up, frozen vegetable started appearing in the markets. If you are of an age to have tasted the first attempts a frozen peas, you will understand why a lot of us grew up hating anything with the word ‘vegetable’ in it!

Fortunately, I had somewhat discerning children who usually ate their vegetables without TOO much complaint especially if said meal was followed by cake or ice cream. These days, it is a rush to serving yourself vegetables as my children will take the majority of them. It only took years of me experimenting and finding ways to make the dreaded vegetable portion of dinner tasty.

These days, everyone’s favorite cooking method for vegetables is cutting squash, cabbage, broccoli, etc., into chunks, tossing them with olive oil, salt, pepper, and any other herbs and spices that sound good to you. (Want a really good source of great herbs and spices? https://www.thespicehouse.com/). You lay the prepared vegetables out on a parchment paper line baking sheet and bake for about 10-15 minutes or until there is a slight browning and they are JUST tender. You can have grated Parmesan on the table for a tasty addition.

I never ate Kale until about five years ago. Now it goes into salads, soups, stews, and often gets roasted for a fun, vegetable side dish. Easy, too! Just tear the leaves in large pieces from the woody stem and soak in a bowl of water with a fourth cup of vinegar for about five or ten minutes, rinse, and pat dry. You can do this ahead and roll the rinsed Kale in paper towel, cover in saran wrap, and refrigerate until needed. In a large bowl, toss the leaves with enough olive oil to give it a LIGHT shine. You don’t want to drown it. Add salt, pepper, garlic powder, onion powder, etc. So many choices to be had from the spice shelf! Arrange the leaves on a parchment paper lined baking sheet and bake at 350 degrees until the leaves are crisp to the touch.

Savory Cookies

Crackers are great with soup but a homemade savory cookies takes the points. And, such recipes can be adapted to whatever cheese or seasoning you have on hand.

Savory Cheddar Cookies
1 cup all-purpose flour
1/2 salt
1/4 teaspoon baking powder
1/2 teaspoon hot mustard powder
4 ounces sharp cheddar, grated finely
1 stick softened butter

Sift together the dry ingredients.

Blend together the cheese and butter until relatively smooth. Mix in the flour mixture by hand or with a dough blade with your mixer. Mix until it forms a ball.

Divide the dough in half, form each half into a cylinder, wrap in clear plastic wrap and refrigerate for a least three hour or overnight. (A great make-ahead idea that can be baked just before dinner or the arrival of guests)

Preheat oven to 350 degrees and line baking sheets with parchment paper. Remove cylinders of dough from the refrigerator (if you froze them, take them out 30 minutes early) and slice them into even discs and place about an inch apart on the prepared baking sheets. Bake for 12-15 minutes or until golden brown. Remove from oven and let rest on the baking sheet for ten minutes and then place on cooling rack.

These are nice to go with soup, salads, stews, or just for a lunchbox snack.

If you are gluten-free, Better Batter gluten-free ‘four’ mix or Authentic Foods – Steve’s GF Bread Flour works well, cup for cup.

Chocolate Coffee Chip Cookies

Okay, get your ovens going and get something along these lines baked TODAY! Don’t bother with doubling the recipe, either, as Ash Wednesday is only about two and a half days away from now. In fact, my excellent ice cream making daughter already has her orders to make me a pint of orange ice cream TODAY or she WILL have a very penitential Lent!

Chocolate Coffee Chip Cookies

2 cups all-purpose flour
1/2 teaspoon baking soda
Pinch of salt
2 teaspoons instant coffee granules or, better yet, a teaspoon of espresso powder
1 tablespoon water or fresh orange juice
3/4 cup room-temperature butter (Margaine just won’t do!)
1/2 cup lightly-packed dark brown sugar
1/4 cup granulated sugar
2 eggs, room temperature
1 teaspoon vanilla extract
1 cup either milk or semi-sweet chocolate chips
1 cup white chocolate chocolate chips

Sift together the dry ingredients in a small bowl and set aside for now.

Mix the coffee granules or espresso powder in the 1 tablespoon of water or juice.

In a mixing bowl, add the butter and sugars and beat until well-incorporated and the mixture is smooth and fluffy. Blend in the eggs, vanilla, and dissolved coffee. Mix in the flour mixture until just blended. Fold in the chocolate and white chocolate chips.

Divide the dough into two and form them into approximately two-inch round rolls, wrap in plastic wrap and refrigerate at least two and a half hours.

Cookie time! Preheat oven to 350 degrees and line three (or as needed) baking sheets with parchment paper. With a large, sharp knife, cut approximately 15 slices from each dough roll. Place the slices about two inches apart on the prepared baking sheets (because of spreading during baking), and bake for about twelve minutes or until golden brown. Let cookies cool ON the baking sheet for about ten minutes before removing them to a cooling rack. If you weren’t planning on sharing these pre-Lenten cookies with your children, hide them NOW!

Palatable Salmon!

Okay, I’m going to share my ‘secret’ recipe that keeps my husband thinking I’m a good cook! As brought to mind in a previous posting, Lent is almost here will find a lot more fish on the dinner table. Our go-to is usually salmon . . . mainly because we can get it at one of the big box stores for a reasonable price and it is the one fish that we will all agree on for dinner. Boneless fillet strikes a chord in my kitchen prep time heart! I prepare it a variety of ways but baked in the oven on one shelf with vegetables roasting in a pan on the bottom rung of the oven makes my Lent a little too easy.

Okay, your have purchased your nice pink slab of boned salmon. Line a baking pan (with a rim for escaping juices) with parchment paper and place your fish on it. Preheat your oven to 350 at this time.

My secret sauce recipe? Go to Walmart (best price on this ‘secret’ sauce!), go to the condiments aisle under Asian and look for Tsang Stir-Fry Szechuan Spicy Sauce. You will need most of one bottle for this recipe. By the way, the bottle of sauce IS my secret sauce recipe!

Spread the sauce over the fish. The sauce is spicy so taste test as to how thick a layer you prefer. Now, generously shake on sesame seeds. How much is up to you. My family likes a lot. https://www.thespicehouse.com/sesame-seeds-white The Spice House is the best price for ordering sesame seeds.

Bake in your pre-heated oven until cooked which for a fish fillet means the fish will flake when pressed with a fork. It goes well with a salad and a side of rice seasoned to taste.

Lent? When Was Christmas Over?

There is a rumor going around that Lent is just about upon us! Time to think about the ‘give-ups’ and the extra prayers that are needed in this spiritually declining world. One of our annual ‘give-ups’ is taking meat out of the diet on both Wednesdays and Fridays. On the surface, it seems it might be a little too easy but after six weeks of coming up with meatless meals for both days of the week plus insuring my husband has meatless meals and snacks for his work lunch, the challenge makes itself known.

One of our favorite go-to meals has been a quick pasta meal with a salad. It is meatless and somewhat less in volume than a usual evening meal and seems to provide all the nutritional perks and sacrifice to keep us strong for Lent!

Lenten Pasta

1 pounds of spaghetti (or any shape you might prefer)
3 eggs
½ cup freshly grated Parmesan and/or Romano
½ teaspoon granulated garlic
Salt & black pepper to taste
1/4 cup butter

Cook the spaghetti until almost done, drain, and stir in the butter, garlic, salt, and pepper until the butter is melted.

Lightly beat the eggs and stir into the pasta. If the pasta has cooled down too much, turn on a low heat to warm. Immediately after adding the eggs, mix in the cheese and stir to combine. If you like a creamier outcome, you can add a bit of milk to taste.

Great quick meal on a day when dinner time approaches before you are ready for it!

It is a very versatile dish in that you can add some chili flakes, drained tuna, use cheddar instead of the Italian cheeses, add some finely-diced parsley, some fresh mushrooms braised in a bit of butter or olive oil . . . Basically, look in the cupboard, see what you have, and you can come up with an original entree.